Sheets and alerts with async functions
How sheets and alerts can be modeled with async functions.
This post is part of the series about navigation. Earlier posts: Setting the stage for navigation with async functions
Sheets and alerts
It may be tempting to model sheets and alerts in the same way as navigation from screen to screen. At first glance it looks like vertical navigation (as opposed to horizontal navigation for screens), and it’s appealing to use the same APIs for both. However, sheets and alerts differ in important ways:
There is no flow. For regular navigation, it’s easy to imagine a long chain of screens: A -> B -> C -> D, etc. For sheets, even more than one level of nesting is bad practice (a sheet that opens another sheet looks weird even if it’s possible). For alerts, it’s always A -> B -> A.
Both sheets and alerts are usually very contextual to the screen that presents them, whereas each screen in a typical navigation chain is more independent.
The native APIs for showing sheets and alerts are very different from navigation (reflecting the differences above). Having higher level APIs that embrace those differences is easier to support.
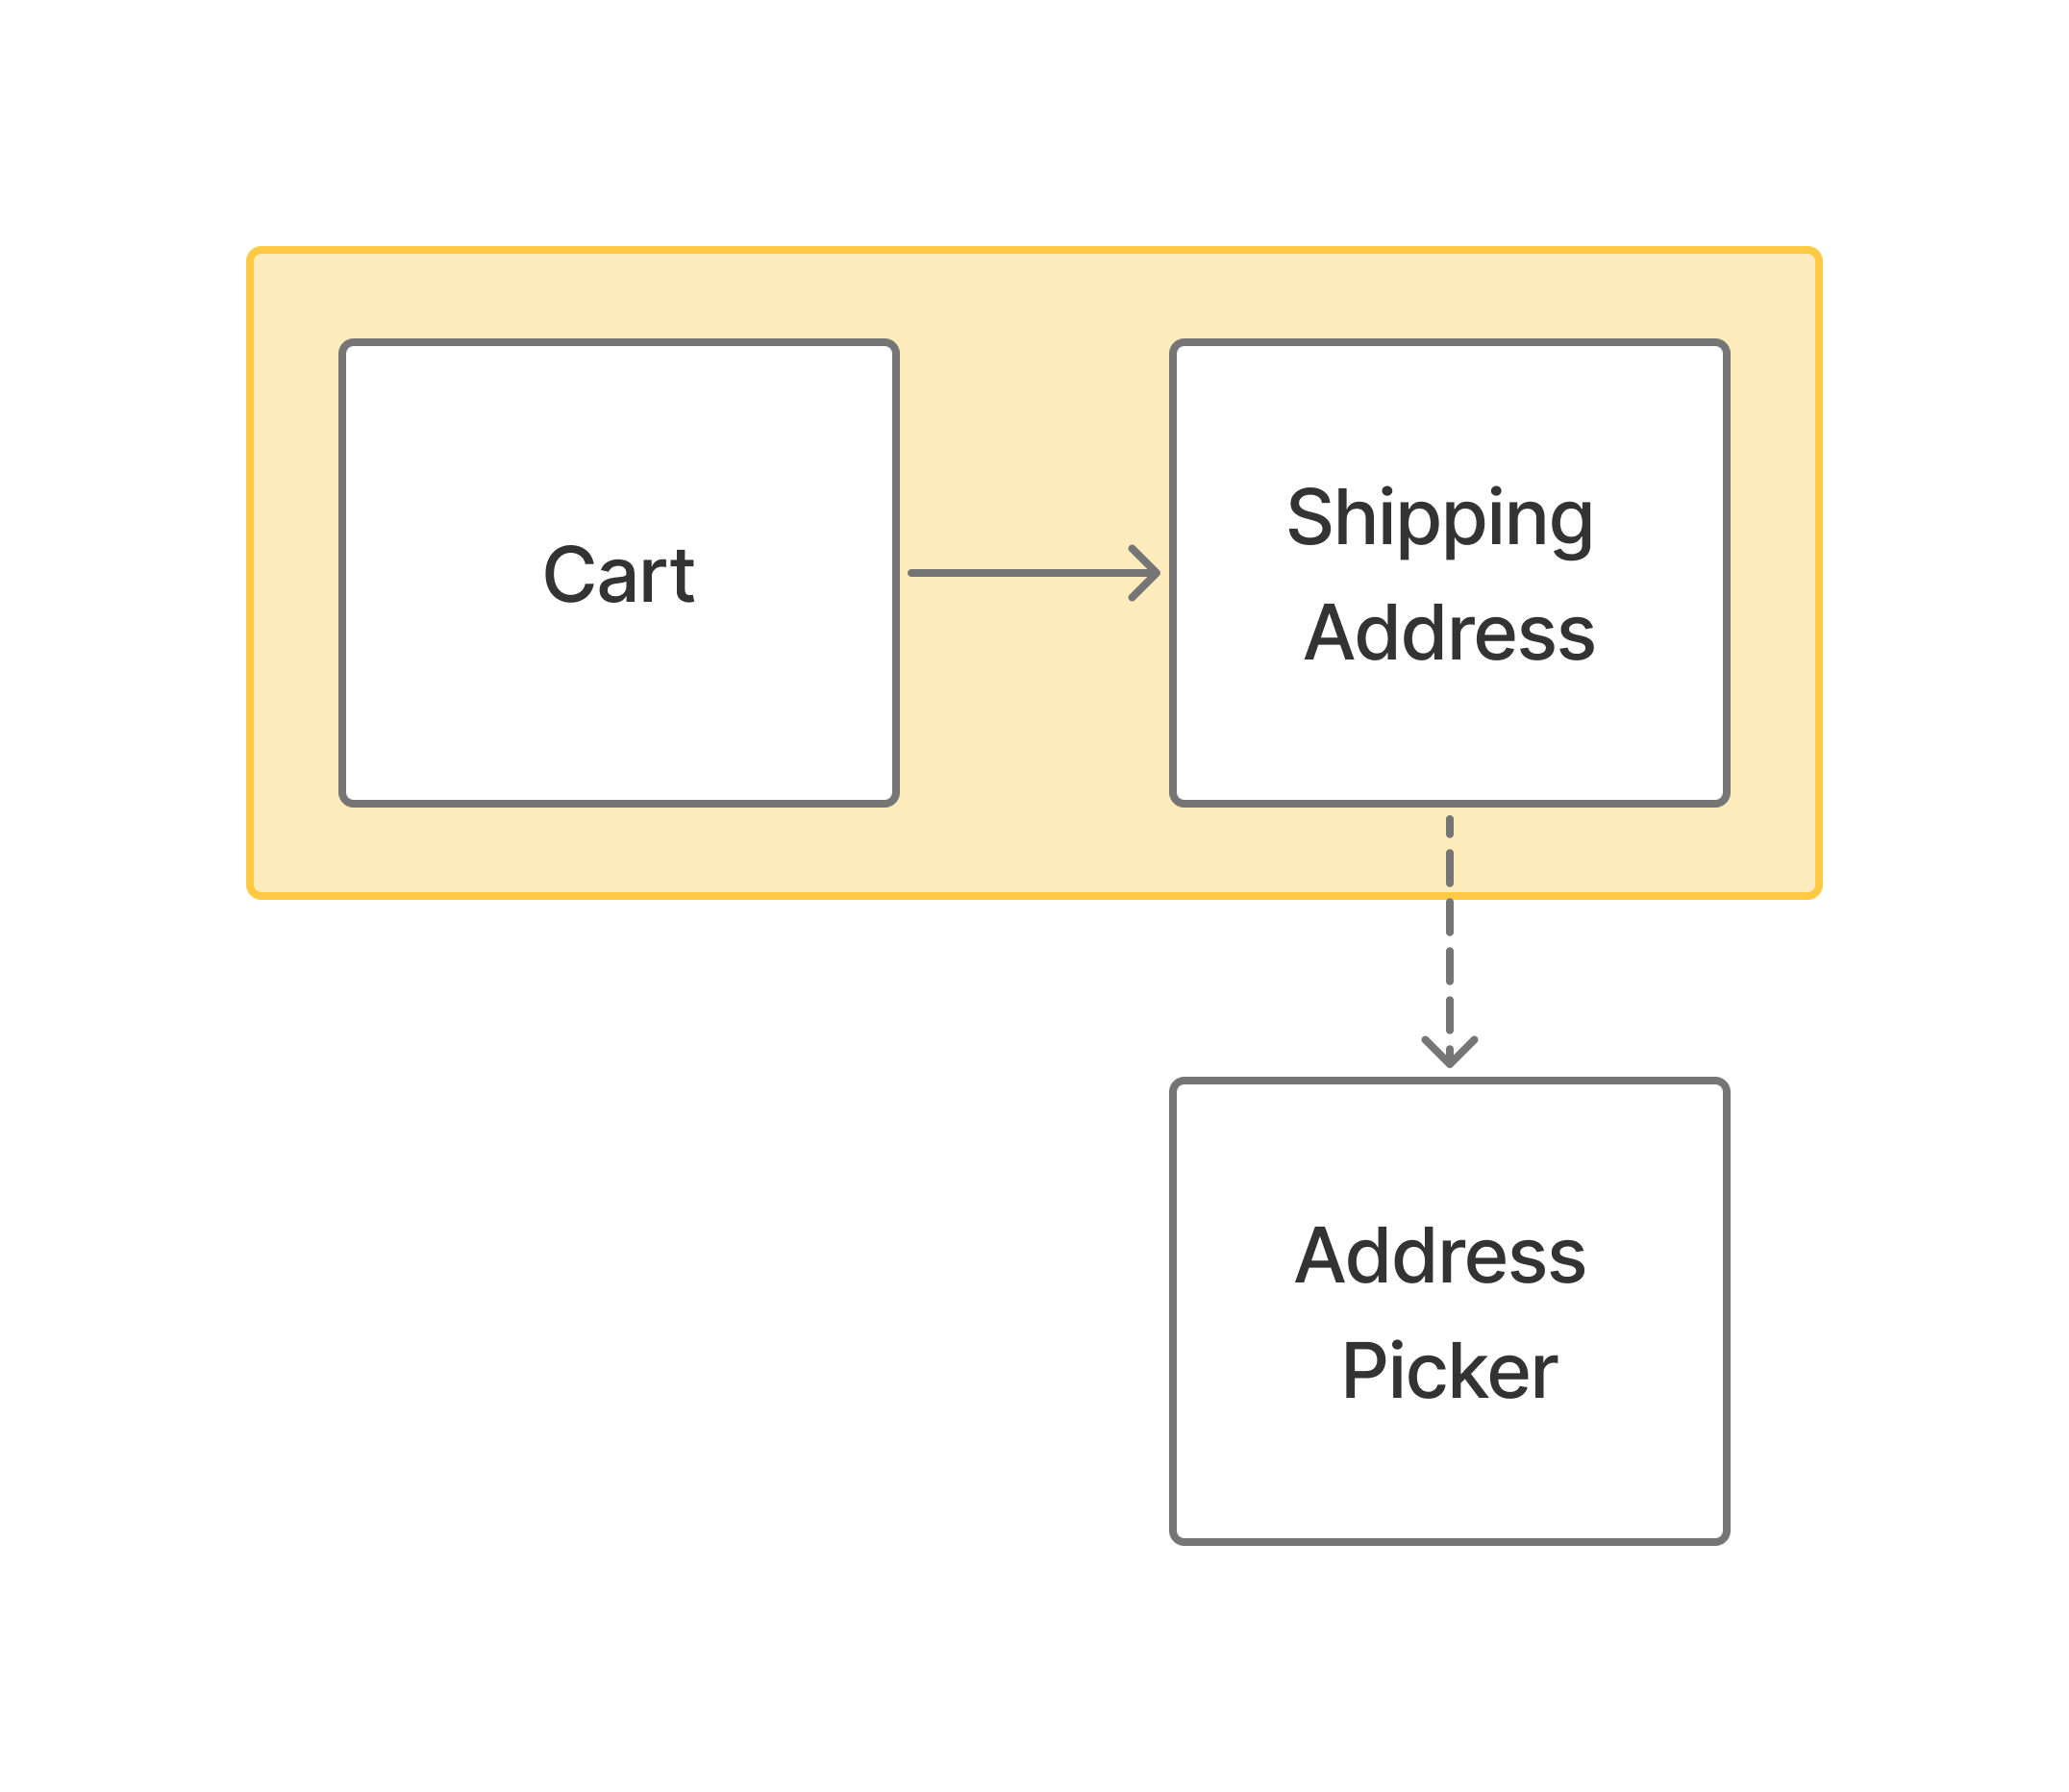
Conceptually, the clearest way to represent a sheet or an alert is via an async function. For example, a screen that asks the user to provide a shipping address might have a sheet where the user might pick an address from the addresses he used previously. This might be represented as
1
let address = try await pickAddress()
If the user closes the sheet without entering a value, the code throws a cancellation error. Returning nil is another option, but throwing is clearer and more flexible:
nilcould be a valid value or cancellation, while a cancellation error always means cancellation.- If we decide to use the same UI in horizontal navigation, throwing an error is more flexible. For example, we could use it to cancel the flow or to pop to a specific place in the flow.
API sketch
It may not be obvious how to do this, but it is very similar to the design of navigation with async functions. The only difference is how the UI appears and disappears. For navigation, we need to maintain a navigation stack and a way to push and pop screens. For sheets and alerts, there is no nesting, so the API can be simpler.
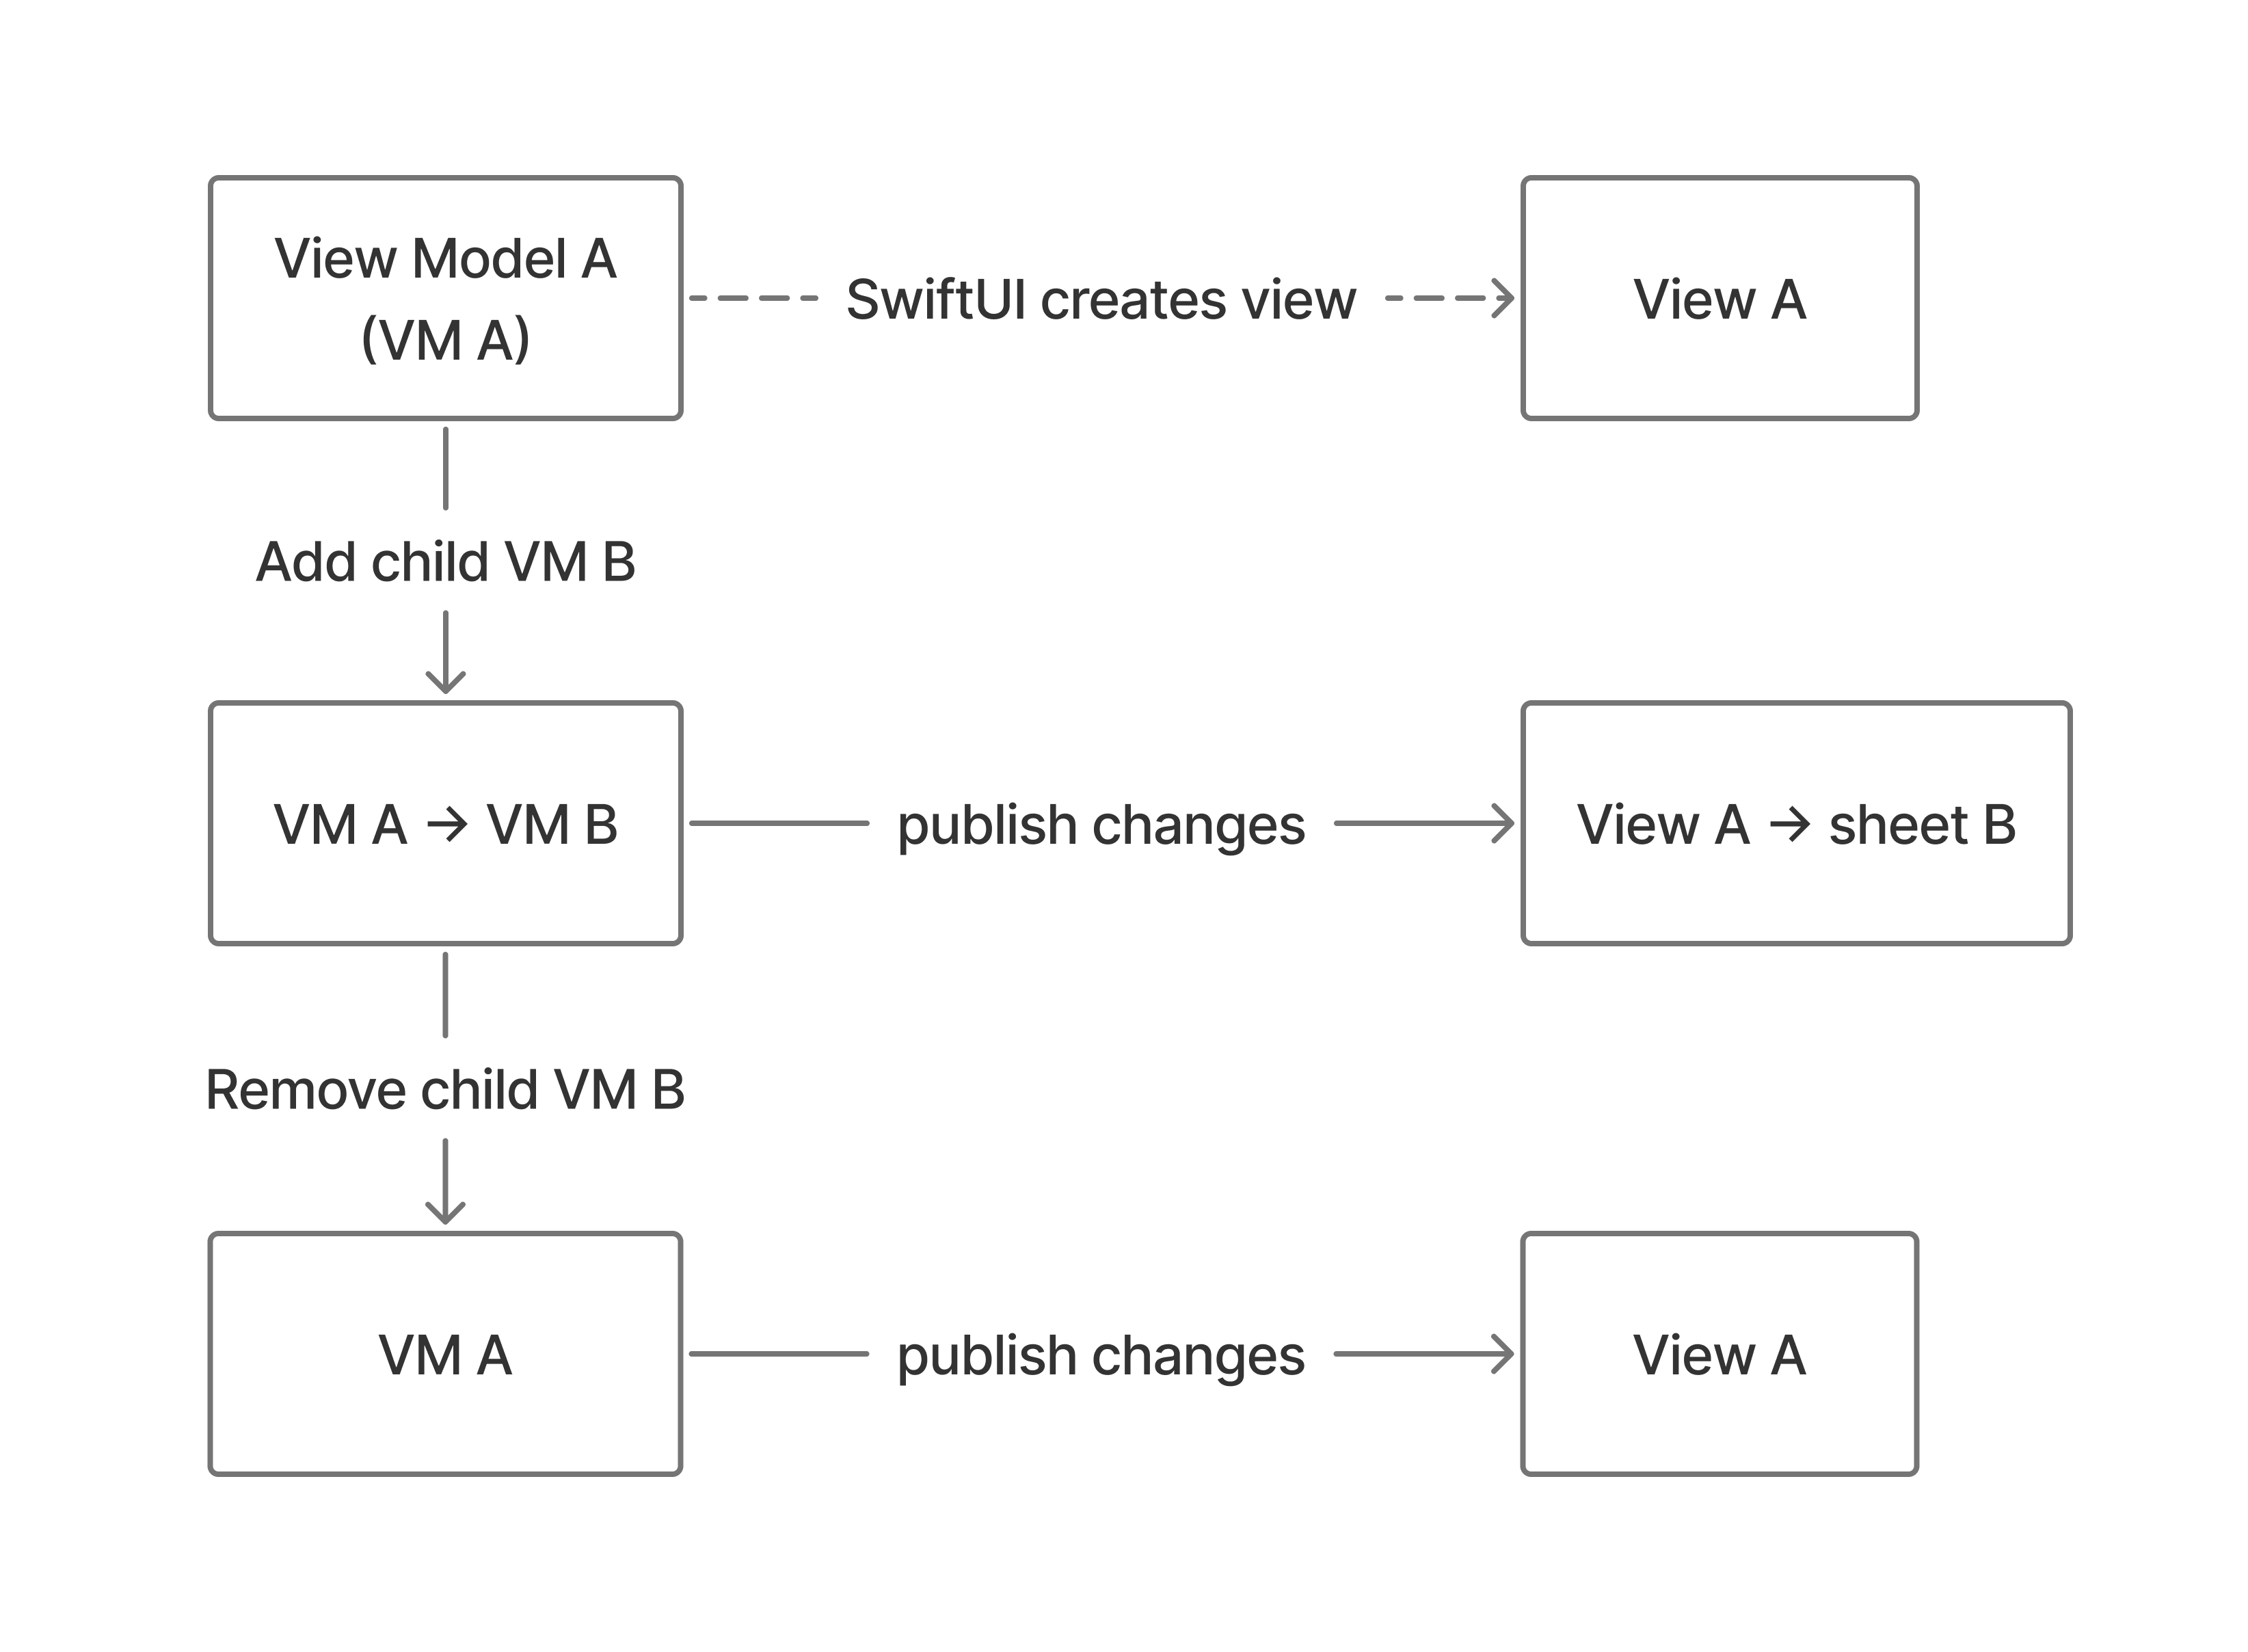
Regardless of how UI appears on the screen (horizontal navigation, presentation, or containment), it would be great to make every self-contained piece of UI composable, so that the caller / owner can show and interact with it in any way that is most appropriate for the design. This is very similar to UIViewController in UIKit, but SwiftUI makes it simpler. In SwiftUI, the actual view object that backs the view struct is opaque – SwiftUI creates it automatically from the view struct. The view struct is very lightweight and is constructed many times in the view cycle. This means that as long as we have a way to create a SwiftUI view from the view model, we don’t need to store the view separately, and the whole app UI can be represented as connected view models. For example:
For horizontal navigation, the layer that manages the navigation stack can store the view models. For sheets and alerts, the presenting view model can store child view models directly, while they are presented. The view for the presenting model gets updated whenever the child view model is added or removed, using the general view update cycle in SwiftUI.
Sheets
For the example with picking an address, the whole task would then look like this:
1
2
3
4
let addressViewModel = AddressViewModel()
addChild(addressViewModel)
defer { removeChild(addressViewModel) }
let address = try await addressViewModel.firstValue
where addressViewModel publishes the first value when the user picks an address. (If the address sheet was part of the horizontal navigation, the user could come back to it at any time and pick a different address, but in this case, we care only about the first value because after that the sheet is dismissed.)
The pattern is the same for any sheet, so we could turn the last 3 lines into a function, making it even simpler:
1
2
let addressViewModel = AddressViewModel()
let address = try await run(addressViewModel)
Alerts
Alerts are slightly more complicated because the only customization that Apple APIs provide for alert UI is the buttons to display. This means that if we want to use an async function for running an alert, we need to use a continuation that completes inside those buttons. The continuation exists only while the alert is active, so we can use the continuation to also tell SwiftUI when to show an alert.
For example, if we want to show an alert asking whether the user wants to save an address or use it only once, we need this continuation:
1
2
@State private var shouldSaveAlertResult:
   CheckedContinuation<Bool, Error>? = nil
that we can keep as part of the view state. The value is non-nil only while the alert is active, and during that time, the user cannot do anything except interact with the buttons for the alert. When the user taps a button, the continuation is invoked exactly once and then set to nil, so the continuation is cleaned up immediately after dismissal. The continuation error type is not Never because the system might dismiss the alert on its own due to some external event or some other processing in the app. In that case, the continuation cannot finish with a value and has to throw an error.
Using this continuation, the actual alert UI code can look like this:
1
2
3
4
5
6
7
8
9
10
11
12
13
14
15
.taskAlert(
   "Save Address?",
   $shouldSaveAlertResult,
   actions: { complete in
      Button("Yes, save") {
         complete(true)
      }
      Button("No, use one time only") {
         complete(false)
      }
   },
   message: {
      Text("Add the address to recent?")
   }
)
where taskAlert is a wrapper for alert from the SwiftUI API. In this wrapper API, complete is a callback that calls the continuation. This wrapper API also implements the presentation logic, tying it to the value of shouldSaveAlertResult. If the alert is dismissed by the system without providing a value, taskAlert can catch this in onDisappear and resume the continuation with a cancellation error.
To actually run the alert, we need to use withCheckedThrowingContinuation in an async context that we can create as part of initiating the alert. Here is one way to do this:
1
2
3
4
5
6
7
8
9
10
11
12
13
14
15
16
17
18
19
20
21
22
23
24
25
26
27
28
29
30
// UI code:
@State private var shouldSaveAlertResult:
   CheckedContinuation<Bool, Error>? = nil
...
Button("Done") {
   viewModel.done()
}

// model code:
if Address.isSaved(address) {
   publish(address)
}
else {
   Task {
      guard let shouldSave = try? await env.getShouldSaveFromUI() else { return }
      if shouldSave {
         Address.save(address)
      }
      publish(address)
   }
}

// setting the environment in the UI:
viewModel.env = .init(
   getShouldSaveFromUI: {
      return try await withCheckedThrowingContinuation { continuation in
         shouldSaveAlertResult = continuation
      }
   }
)
With this implementation, the model code reads exactly as we would express it in English.
Implementation
While working on this post, I moved async navigation APIs from TRA into its own package, AsyncNavigation. AsyncNavigation provides implementation for sheets, alerts, and horizontal navigation.
Using AsyncNavigation, you can show a sheet just like in the pseudocode above. Here is the code from the complete example for this post:
1
2
3
4
5
6
7
8
Button("Use Recent") {
   Task {
      let addressPicker = AddressPicker.ViewModel()
      if let address = try? await viewModel.run(addressPicker) {
         viewModel.update(with: address)
      }
   }
}
Alerts work exactly as described above, and the example uses that code to ask the user whether to save a new address.
The example app flow looks like this:
1
2
3
4
5
NavigationFlow(addressForm()) { address, proxy in
   await done(address: address, proxy).then { _, _ in
      proxy.popToRoot()
   }
}
In this basic flow, the user fills an address form (either directly or using a recent address picker). Then the app shows what the user picked on the next (done) screen. Finally, the user can start over. If you look closely, this description translates very naturally to the code above.